Thursday 24 April 2014

Country Garden Inlaid Embossing

Wow - what a week! On Easter Friday Matt and I went for another training cycle.  It went really well, but unfortunately was swiftly followed by a lovely bout of flu-like illness and I'm only just surfacing from the haze now! It was bad enough that I haven't picked up a single stamp this week :(.  Still, I'm ready to get back to work tomorrow and thankfully I had a couple of cards already prepared to show you so, Blue Peter styley - here is one I prepared earlier :).......

This is one more go at the gorgeous Inlaid Embossing technique.....a Summer's Day feel for a beautiful day here in Southampton - the sun is shining! :)


I got out the Dress up Framelits for the first time in AGES.  I made some arms, and a hat out of crisp canteloupe, and I used Birthday Basics DSP for a couple of layers of grass. This is how it looked before I put it through the embossing folder....


Do you prefer pre or post embossing??

Here's to a healthier weekend for me :)

Leigh-Anne
x

Sunday 20 April 2014

Delicate Doilies Inlaid Embossing

Here's my second go at 'Inlaid Embossing'.  This is Birthday Basics on Very Vanilla Cardstock, using the Delicate Doilies Sizzlits.  


Totally addicted - I love it!!

Leigh-Anne x

Sunday 13 April 2014

Fun with flowers!

Today is a GLORIOUS day in Southampton.  My neighbour is growing some beautiful Tulips in his backgarden and kindly donated me a couple of them for my flower pressing experiment.  If you've followed my blog you'll know I recently made a card using some petals I had popped in a book last year and then forgot about....so this year I am experimenting with petals and I'll be back in the Winter or maybe early next Spring to let you know how the colours came out......here they are going in for pressing.....


 I wonder what colour they'll come out?! It's a bit of a waiting game this one :)

Leigh-Anne x


Upcoming Class Dates

Here are my upcoming class dates:

Message me if you'd like to join!

Thursday 24th April (Hedge End) 18:30-20:30
Sunday 11th May (Shirley) 19:30-21:30
Sunday 8th June (Shirley) 19:30-21:30
Sunday 13th July (Shirley) 19:30-21:30

We make three projects, this is an example of what we made last month.....


The cost is £10 (+glue - if you haven't been before i'll explain on the night - it doesn't apply to your first visit)

Special upcoming class!

Thursday 5th June (Shirley) Afternoon (13:30-16:30) or Evening (19:00-22:00) - this is a Special Keepsake Class where we will make the Baby's First's Scrapbook you can see pictures of here.  The cost of this class is £25 and includes everything you need to make this gorgeous and very special handmade Scrapbook. If you would like to join me then send me a message by Thursday 22nd May.  Payment by direct bank transfer by the same date, I will supply details on booking.  I hope you can join us! Leigh-Anne x

Saturday 12 April 2014

A Special Keepsake

Would you like to come and make this with me? I'm doing a one off special class on Thursday 5th June 2014. See my Upcoming Class Date page to book a place 

So - back from yet another cycle! The 'bike fit' worked - no right knee pain - yay! It made a really massive difference - much more enjoyable. We did 37 miles today, pretty slow but it's getting better.  It was the first time my Dad had taken us out and I think we were almost fast enough to make it bearable for him! He's turning 60 this year and he's way more bike fit than I am.  Here we are setting off....


I'm loving that it means I can eat loads of cake and chocolate without feeling guilty - I ate extra food last night, more for breakfast this morning, and a chocolate bar almost half way round.  We then stopped at a lovely cafe and had a large slice of Vanilla Fudge cake and a large mug of tea before heading back to a large bowl of soup and home made sour dough loaf for lunch. What can I eat now?.......

Anyway - back to the Stamping!

Last year my Stampin' Up Mummy Liz, did a special class where we made a beautiful Vintage Scrapbook.  I love all things vintage so there was no way I was missing it and I loved the result!  You can purchase the instructions from her blog for just £3.95 and the structure of the scrapbook also works for any other small scrapbooks - and I made one earlier this year for my vintage postcards - you can see it here

This scrapbook is a little more special.  LOADS of our friends are having babies at the moment and I wanted to make a babies 'firsts' scrapbook with the beautiful DSP Birthday Basics.  As mentioned before I'm generally a vintage girl, but occasionally a fresh bright paper comes along and really inspires me.  I've struggled to leave this paper alone!!


The book is tied with Crisp Canteloupe Ribbon, and has various size panels and patterns from the Birthday Basics DSP on the cover.  

This is the closed, and tied book.  I've left the front blank so that I can add a name and date of birth
I've tied the book with crisp canteloupe ribbon, and added Labels Collection Framelits in various sizes to the front, along with a Lion from the gorgeous Zoo Babies.
The first page
The first page has room for all the important details, including a little frame for a first pic.  I created the words for the whole album in a word document and printed them out onto Very Vanilla cardstock.


I created the little envelope using my scoring board, but the new envelope punch board would be perfect

This page took a little bit of time to create! I wasn't sure how I wanted the pseudo-family tree to work - in the end I kept it really simple.  I thought about adding siblings and then it occurred to me that these books only really get done for the first baby anyway unless Mum and/or Dad are super organised and committed. 

I handcut the wiggly bits!


This has got space for a little note from Mum and Dad, and a pocket for  a copy of their birth announcement


Zoo baby stamps - AWESOME!

The lower piece of DSP forms a pocket, to slot in photo's and a list of visitors.

I absolutely LOVE the Zoo Babies stamps, but they weren't coming to life enough when I first stamped them.  I found using a very tiny circular punch and using biro for pupils really makes the eyes pop, and i've taken to hand cutting a tiny heart to add to most of them....

Spaces for photographs, and to stick a lock of hair


you can't miss out a first handprint and footprint!


All the firsts! I've used a slightly larger punch for the eyes of the Rhino and Elephant 


So - that's it! My very special 'Firsts' Scrapbook. I hope you like.  Back to the cake for me now......:)

Leigh-Anne 
x

Would you like to come and make this with me? I'm doing a one off special class on Thursday 5th June 2014. See my Upcoming Class Date page to book a place 


Wednesday 9 April 2014

Inlaid Embossing

So - I've had a pretty fun day today! Having never cycled before I got on a bike about a month ago and have been training for an 80ish mile ride for charity in June.  I've managed about five rides so far, the longest being about 40 miles, but I've been having some problems with my right knee.  A friend suggested a 'bike fit' might be helpful - and I managed to book one for this morning.  I have to say it was pretty thorough - apparently I have high arches, one leg might be a little longer than the other (who's isn't??) - and I've come away with a much higher (new) saddle, shoe inserts, newly positioned cleats - and a newfound respect for the science of cycling! I think it's a little like trying to sort out your gold swing.  I will be trying out the new position properly this weekend so we'll see how it goes...... I then spent the afternoon meeting Elin who is my lovely friend Kristin's new baby, and catching up over a cuppa and some cake.  Elin is just 2 weeks old and she is absolutely GORGEOUS.  I of course took a hand made card with me and spotted another gorgeous Stampin' Up card on the mantlepiece from Liz (see her blog here)

Anyway - back to the cards.  I found this technique online and I CANNOT believe I hadn't thought of doing it before.  It's pretty straightforward - you put your layered card through the big shot in an embossing folder, and it comes out looking like it's all one layer.  This is a slightly more built up version of one I saw online and I love this technique already.  I tried a few cards and on this one I really pushed it with the number of layers I put through the big shot but it doesn't seem to matter - I was worried that the lines would become too distorted but it all came out really well.


I'll be back with some more examples later......

Leigh-Anne x

Saturday 5 April 2014

A Special Wedding RSVP

Our very good friends Laura and Neil are tying the knot this year! Yippee!  This is us all together in the French Alps earlier this year....


They have picked the brilliant venue near their home of HMS Warrior, and Neil came up with this design for their wedding invite. He made no bones about telling me that he expected a suitably awesome RSVP from a card craft addict.  I don't think mine has come out quite as classy as the invite (first pic), but I had a very good go!  It was also late :) I hope they'll still let us come along!!


So - here is my interpretation.  I used The Open Sea Stamp Set, the World Map, and lots of brown colours- Crumb Cake, Soft Suede, Chocolate Chip, Early Espresso......there's also a bit of Tangerine Tango in there. I've written as neatly as I can (As a doctor I've definitely been trained in messy writing and I find it extremely hard work to write neatly!) in Early Espresso marker pen and I masked the date and a 'Sun'. 


And this is the back...very simple - a little sponging, a little more neat writing (!) and our very special Holdsworth stamp. 

I know it was late but I hope it was worth waiting for, and I really hope we can still go to their amazing wedding!!

Leigh-Anne
x

Oh go on then - one last photo of us goofing around in the snow....posers? Us?


Thursday 3 April 2014

Fair Paris!

It's not far off a year since my Husband took me to Paris as a surprise for our First Anniversary! What a beautiful place -  it's the perfect place to spend a special weekend and I'd highly recommend a visit.  As a result I just HAD to have BOTH Eiffel Tower stamps from Stampin' Up - I'm very greedy!! The one I've used here is from a retired set, but the current set Follow my Heart also has a beautiful, slightly smaller version with a heart at the centre.

This is watercolour paper cut to a regular card front size, and then watercoloured  using an Aqua Painter and (from bottom to top) Pink Pirhouette, Blushing Bride, Wisteria Wonder/Elegant Eggplant combination, and Rich Razzleberry. I've used a marker in Early Espresso around the edge to create a border and a little bit of Gorgeous Grunge at the bottom..


The Eiffel Tower is printed in Early Espresso Ink.  I used Bruce (The Stamp-a-ma-Jig) to get it just where I wanted it.  Those of you who have been to Paris will know that once the sun sets, every hour the Eiffel Tower gets lit up with beautiful sparkly lights and I wanted to give just a hint of this(being a Dazzling Diamond I love all things sparkly!) So -  having stamped in Early Espresso I then very speedily covered it in Heat and Stick Powder -  heated -  and added just a sprinkle of Dazzling Diamonds to the right side.  I did try covering the whole thing but it lightened up the colour just a little too much. 
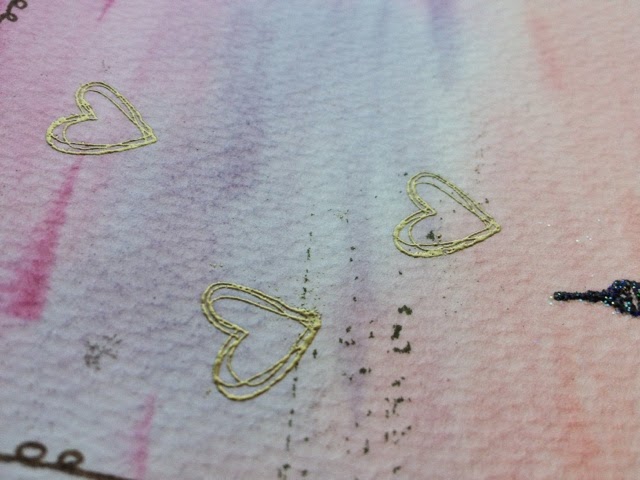

You can't go wrong with gold embossing powder! This uses the end Heart from a stamp in the current set Language of Love

The back was pretty straightforward - a little watercolour and the Postcard Stamp in Rich Razzleberry.  As you can see from these photo's it ended up a little bent from all the watercolouring - I popped it under a heavy book overnight and it came out perfectly flat!

Dazzling I hope! :)

Leigh-Anne